Configure the Digitise Apps Client on a Developer's Test Apple Device
Once you have downloaded and installed a pre-configured Digitise Apps Client, if the Client hasn’t been pre-configured with the App Server address, you will need to configure it to point to your App Server and you may want to configure other available Settings.
-
The pre-configured Client can have some configuration options pre-set, including the App Server address details. Settings can also optionally be locked so that they cannot be changed once the Client has been installed to a device. Locked settings are visible within the Client but cannot be changed.
To view, enter and edit the App Server Address details and other configuration options:
-
Load the Digitise Apps Client by tapping on the Digitise Apps icon,
 , on the device’s Home Screen.
 -
You may now get a message displayed headed Untrusted Enterprise Developer, saying that your organisation has not been trusted on this device.
Make a note of the organisation’s name and then tap Cancel.
From the device’s Home screen, tap on Settings → General → Device Management.
Tap on the organisation named in the message displayed earlier and then on Trust “<organisationname>”.
Tap on Trust to allow apps from this organisation to run on your device or Cancel to prevent apps from this organisation running.
Tap Back → General → Settings in the top left-hand corner of the window to return to the Settings main page. Press the device’s Home key or swipe up from the bottom of the screen and then tap on the background to return to the Home page.
Locate and tap the Digitise Apps icon again.
-
The Client will load.
-
If this is the first time you have run the Digitise Apps Client and the Client hasn’t been pre-configured to automatically check for updates, the Client’s Home Screen will look like this:
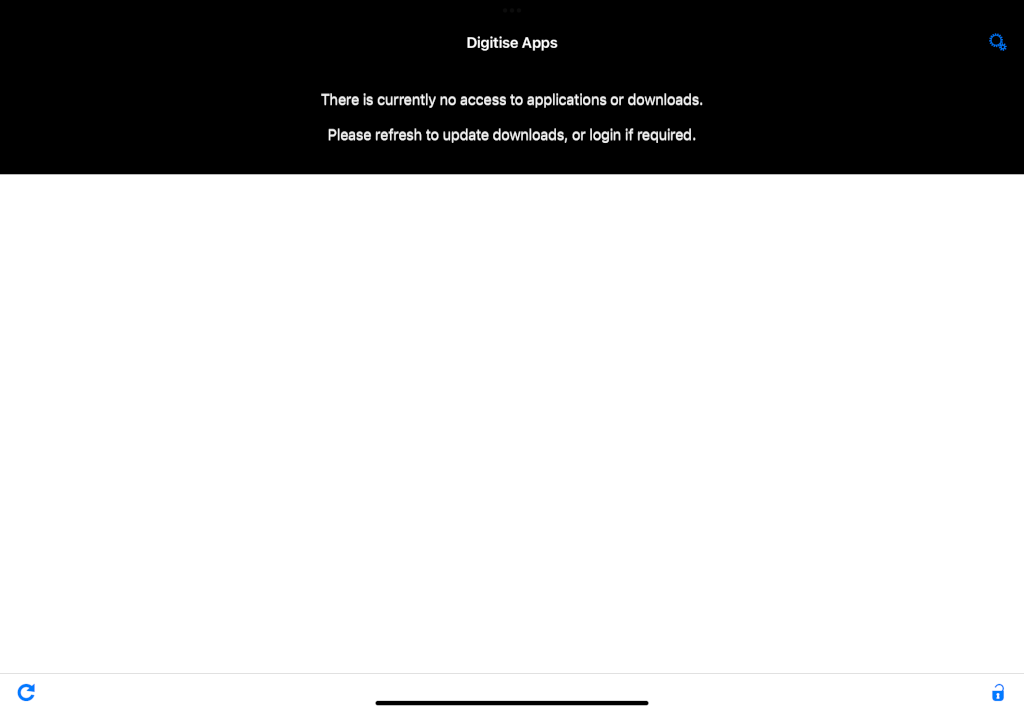
This screen displays the Digitise apps which have been downloaded to use on this device together with those which are available but which haven’t yet been downloaded. If this is the first time you have run the Digitise Apps Client, there will not be any apps listed.
-
At this point you may get a message asking whether you want to allow Digitise Apps to use notifications on this device. To allow notifications tap OK, otherwise if you don’t want to use notifications, tap Don’t Allow.
-
If the Client is pre-configured to check for updates on startup and has an appropriate App Server address configured, you will now see messages displayed at the top of the screen and you may get the login fields displayed, e.g.:
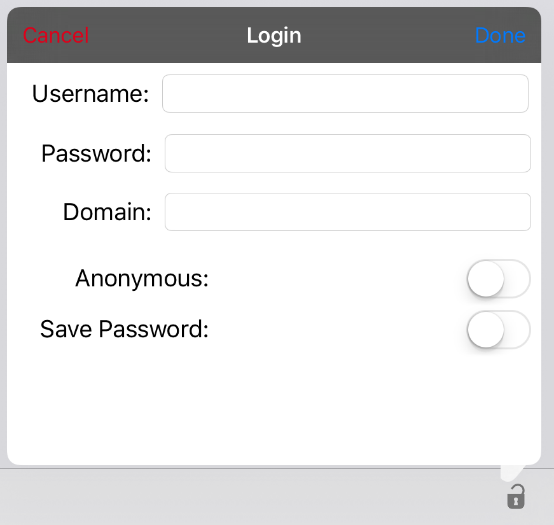
The user login is displayed where Digitise apps have been assigned access permissions and determines which apps will be available on your device.
If the login screen appears, you will need to log in or cancel. If you only want to configure the Client at this point and don’t intend to download or use any apps, you can cancel the login, which should still allow you to access the configuration settings.
If you want to log in, you will need to obtain the login credentials from whoever configured the App Server, if that wasn’t you. There are four types of possible user - a Digitise Apps User, a Windows Domain User, a Google OAuth User or an Anonymous User.
To log in anonymously, simply select the Anonymous option and tap Done.
To log in using Digitise Apps User credentials enter the username and password. If there is a value in the Domain field, you will need to delete this. Note that if you are unable to delete this field, this means that the Client has been configured to only allow Windows authentication and you cannot log in as a Digitise Apps User. As part of the pre-configuration settings, the domain field may have been hidden if you don’t need it to login.
To log in using Windows authentication you will need domain, username and password. You can enter the domain name in the Domain field or include it with your username in the Username field in the format:
<domainname>\<username>
Including the domain name in the Username field will overwrite any domain name specified in the Domain field.
By default, values you enter in the Username and, if shown, the Domain field are automatically saved and filled in the next time the Login screen is displayed. When building a Client for iOS devices, you can turn off username saving within the build request options, if required.
If the Save Password option is displayed, you can instruct the Client to remember your password as well and automatically fill in the password field the next time you log in. Select the Save Password option to save your password. The password entered will be stored in an encrypted database on the device.
The Domain and Save Password options can be pre-configured and can also be locked so that the user cannot change them on the device. If the domain field is locked, you cannot include the domain in the Username field and an attempt to do so will result in an error message being displayed. If the Save Password option is set to not allow password saving and is locked, the option will not be displayed in the Login screen.
If you log in anonymously after logging in as a Digitise Apps User or Domain User, the next time the Login screen displays, the username and password fields will be blank and the Save Password option will be unselected.
When you have entered your credentials, tap Done.
If you need to log in as an OAuth User rather than using Digitise Apps credentials or Windows Active Directory Authentication, the Client will load a browser and present you with the Google login page instead of the login fields shown above. For more details about logging in using OAuth see Log In Using Google OAuth Authentication.
-
If you logged in, you may now see a list of Digitise apps available to download to this device.
In the future, after you have configured the Client and started using it, when you load the Client the Home page will display a list of the apps you have downloaded and any which are still available to be downloaded. If the Client is configured to automatically check for updates on startup, any apps which have updates available will be marked as such.
-
For now, if your Client hasn’t been supplied with the App Server address pre-configured, you will need to enter the required connection details to allow the Client to communicate with its App Server.
To configure the App Server address and other settings, tap on the Settings icon in the top right-hand corner of the screen:
 .
. -
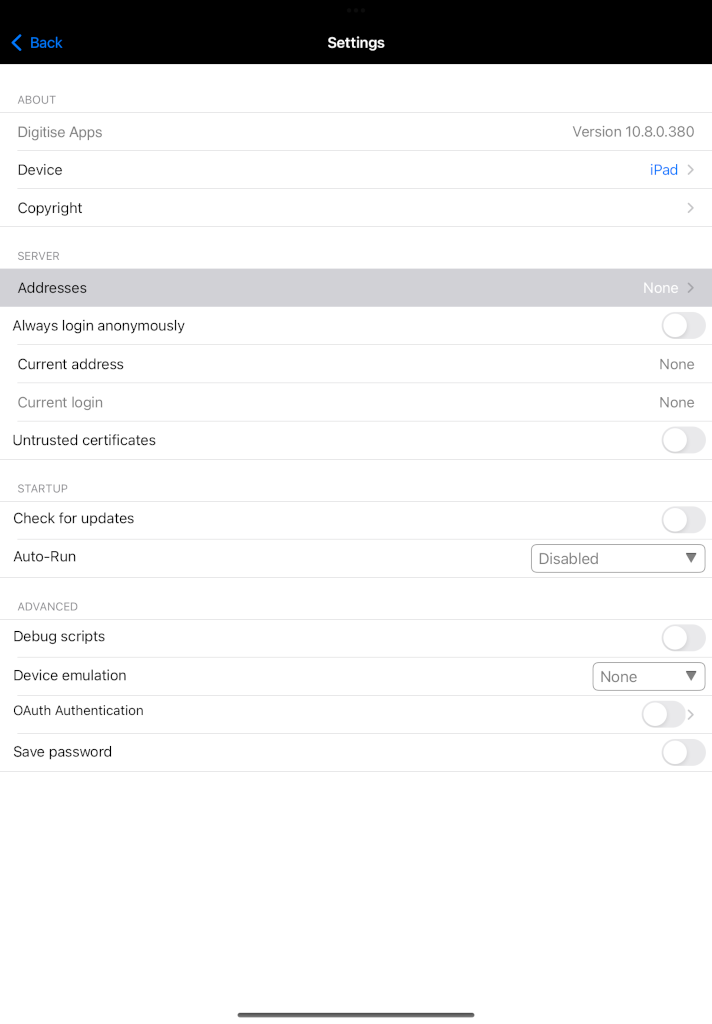
The Settings screen will be displayed:
-
Remember, the Digitise Apps Client may be supplied with pre-set configuration settings and settings may be locked to prevent them being changed on the device. Settings which have been locked can be viewed but not edited. This applies to the configuration settings and Server Address settings described below.
-
-
To view, edit or add an App Server address, tap Addresses to display the Servers screen:
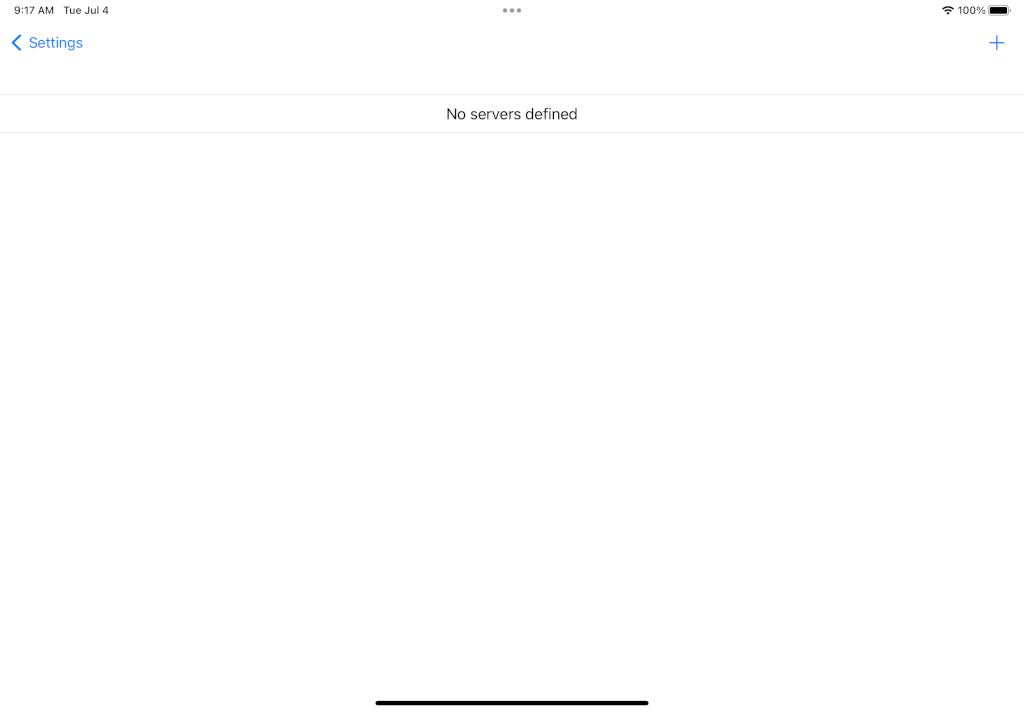
-
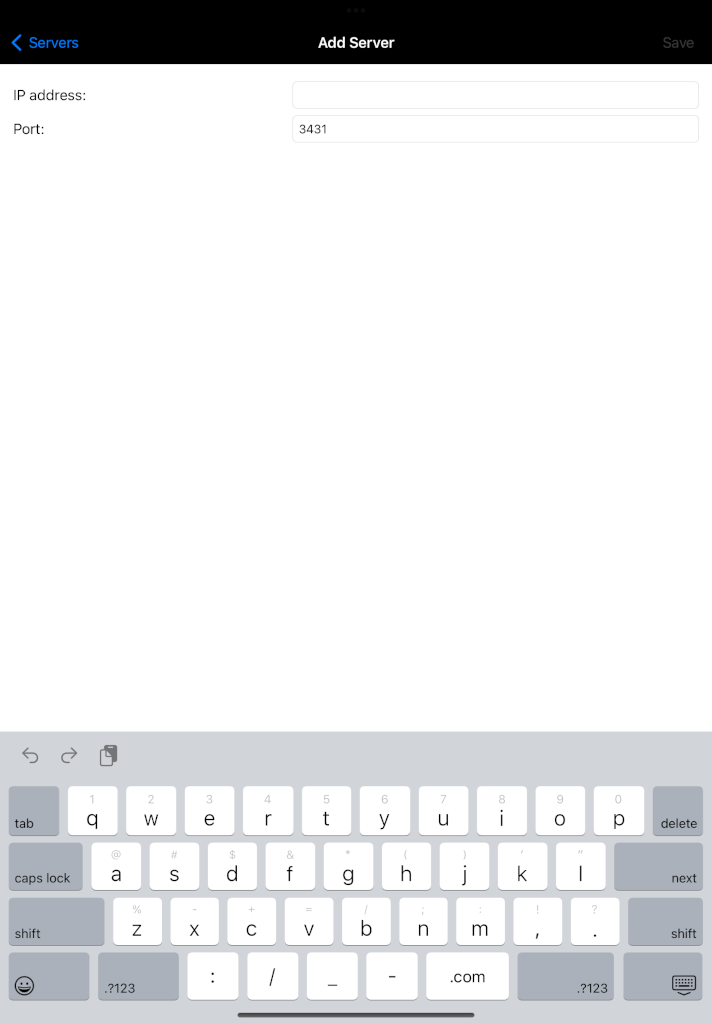
Tap the Add button,
 , to add a new App Server:
-
Enter the DNS name or IP address of the Server running your App Server in the IP address field.
-
If you will be using the enhanced certificate-based private key exchange encryption mechanism for data in transit between your App Server and Digitise Apps Client, and you enter a DNS name here, the DNS name you enter must match one of the hostnames specified in your SSL Certificate’s Common Name field and/or Alternative Names fields.
Leave the Port at its default setting of 3431, unless you are sure that port is in use by another application. Note that if you do change it here, you also need to change it on the App Server, which you do using App Manager - the Port setting can be found within the Server category Properties.
-
-
Tap the Save button,
 , to return to the Servers screen. Your newly entered details will now be displayed:

-
You can enter more than one server in this list if required, for example to provide access to a backup server, and when the Client attempts to connect to the App Server, if the first address in the list fails it will automatically try the next one down and so on. On subsequent connections within the same session, the last used successful address will automatically be tried first. A session ends when you close down the Client/Standalone App or modify the server list.
To add another address, tap the Add button,
 , again.
If you enter multiple Servers, they will be displayed on the Servers screen like this:
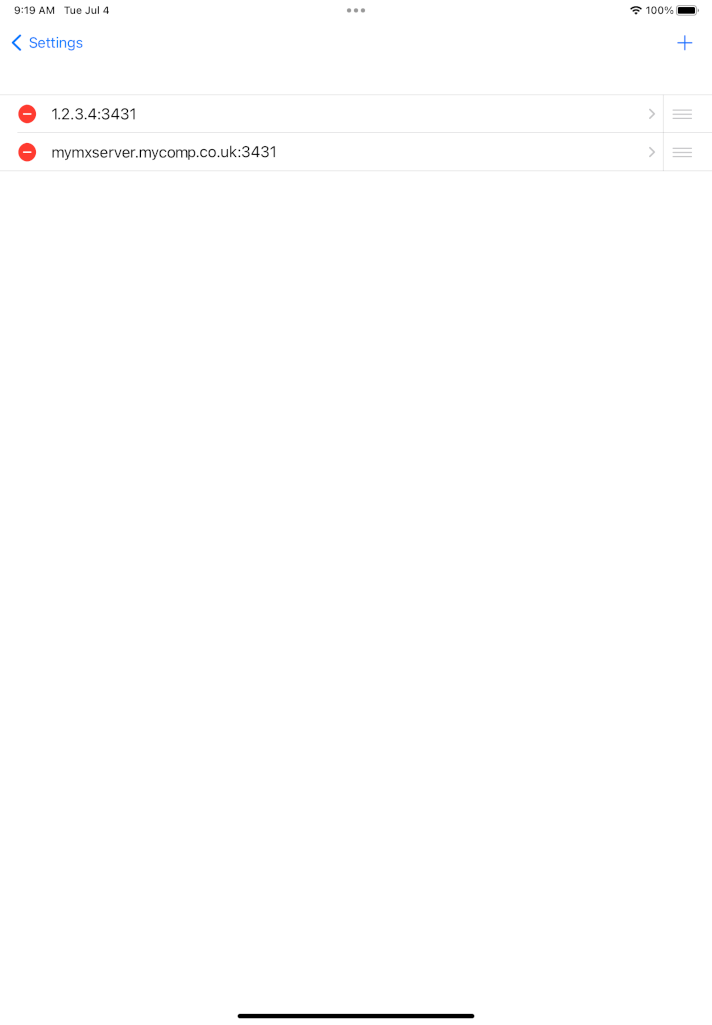
To edit an entry in the Servers list, tap the > at the end of the row.
To delete an entry, tap
 and then tap
  .
.To change the order in which the Servers are listed, and hence tried, tap and hold
 at the end of the row and then drag the row to the position you want it be within the list and release it.
 -
When you have finished, tap
 to return to the Settings screen, which provides access to the client configuration options and system information.
This screen contains the following items:
 ABOUT section
Digitise Apps
Displays the version number of the Digitise Apps Client.
Device
Displays the type of device in use. Tap on > to display more information about the device, including the current operating system version, screen size, IP Address and the expiry date of the Provisioning Profile used to code sign the Client.
The Device screen also indicates whether the Google Firebase crash reporting facility is enabled or not.
Copyright
Tap on > to display various copyright messages.
 SERVER section
Addresses
Add a new App Server address and view currently configured server list.
The address list can be pre-configured when building your Client and can be set to be read only, meaning you cannot change the address(es) here.
Always login anonymously
If set to ON, this option automatically logs into the App Server as an anonymous user when you load the Client. If set to OFF, you will be prompted to enter your login credentials, if required, when the Client is loaded. Login is only requested if you have set access permissions for any of your Digitise apps in the App Manager utility.
Current address
Displays the last App Server the device connected to. If this is not the first server in the Servers list, the next time you attempt to connect to an App Server within this session, the Client will try the address displayed here before trying the other servers in the list. A session ends when you close down the Client or modify the list of Server addresses.
Current login
Displays the username of the currently logged in user. Login is only requested if you have set access permissions for any of your Digitise apps in the App Manager utility. If no user has logged in, this will read None.
Untrusted certificates
This option is only relevant if you are using the enhanced certificate-based private key exchange encryption mechanism for data transferred between the App Server and the Digitise Apps Clients and you are using an SSL Certificate which doesn’t have a trusted third-party Root Certificate, e.g. if you are using a self-signed Certificate.
By default, the option is set to OFF, which means the device must have an appropriate trusted Root Certificate installed in order for the Client to communicate with the App Server. If you are using a self-signed Certificate or the Client displays a message saying that the Certificate is untrusted, you can set this option to ON in order to use your chosen Certificate.
 STARTUP section
Check for updates
If set to ON, this option causes the Digitise Apps Client to automatically check for updates and new Digitise apps on the App Server when it loads. By default, this option is set to OFF and you will have to manually request that the Client checks for updates and new apps.
Note if set to ON you can still manually refresh the Applications list at any time by tapping the Refresh button,
 , on the Home screen.
 Since changes to the App Server configuration, including access permissions and the device purge options, are usually updated on the device only when the device checks for updates and new apps or attempts to download data within an app, you may want to select this option in order to force changes to the server configuration to be automatically updated on the device whenever the Client is loaded.
This option can be pre-configured when building your Client and can be set to be read only, meaning you cannot change the setting here.
Auto Run
Allows you to specify a Digitise app to be run automatically when the Client is loaded so that you don’t have to choose the app from the Applications list.
To specify an app to run, choose it from the drop-down list. By default, this option is set to None, which means that when the Client is loaded, the Applications list will be displayed from where you can manually load any of the available apps.
Note that if you do specify an app to be automatically run, you can still access the Applications screen after that app has loaded using the Home button,
 .
.  ADVANCED section
Debug scripts
This option allows you to start and stop the script debugging facility which allows you to step through your Digitise apps at runtime in order to help identify and diagnose problems.
This option will only have an effect if debugging has been enabled within the app, which is done within App Studio.
Setting this option to ON will start debugging for any apps which have debugging enabled. Setting it to OFF will stop debugging.
For more information see Runtime Debugging.
Device emulation
This option allows you to download and run Digitise apps written for the Android Platform on your iOS device without having to edit the apps for iOS devices first. This option causes the Client to report to the App Server that it is an Android device rather than an iOS device. The App Server will then check for the availability of apps for the device type the Client is pretending to be and which are available to the current user/device and download them to the device.
Note that this option doesn’t allow you to run apps designed for different device types at the same time. Selecting Android will give you Android Platform apps and selecting None will give you iOS Platform apps.
This feature is designed to allow you to get a feel for how an app designed for another Target Platform might look on an iOS device. Form Controls will operate as they do under iOS but the app may not display or work correctly, e.g. any features, such as the operation of individual Scripting Methods, in the original app which aren’t supported under iOS will not work and may have unpredictable results.
If you change this option, remember you will have to set it back to None to receive iOS Platform apps. The Application List indicates when you are running in emulation mode by displaying (Android) after the list title, e.g. Available for Download (Android).
OAuth Authentication
If selected the Digitise Apps Client/Standalone App will use OAuth authentication when logging in.
If not selected, the Client/Standalone App will use the standard Digitise Apps authentication method or Windows authentication to log in users.
OAuth Client ID
This option is only relevant if you have selected the OAuth Authentication option above. You can view and edit the setting by clicking on the > icon to the right of the OAuth Authentication option.
If using OAuth authentication, this option allows you to specify the OAuth Client ID which is used together with the OAuth Client Secret, below, to identify Digitise Apps to Google.
The Client ID is generated by Google when you set up OAuth authentication for Digitise Apps in the Google API Console.
Tap
 to return to the Settings screen.
 OAuth Secret
This option is only relevant if you have selected the OAuth Authentication option above. You can view and edit the setting by clicking on the > icon to the right of the OAuth Authentication option.
If using OAuth authentication, this option allows you to specify the OAuth Client Secret which is used together with the OAuth Client ID, above, to identify Digitise Apps to Google.
The Client Secret is generated by Google when you set up OAuth authentication for Digitise Apps in the Google API Console.
Tap
 to return to the Settings screen.
Save password
Determines whether the Digitise Apps Client will save the user’s password, so they don’t have to enter it in the login screen each time they login. The Client won’t login automatically but will pre-populate the password field within the login dialog.
If selected, the password will be saved.
If not selected, only the Username and Domain fields will be remembered.
Remembered values are stored in an encrypted database on the device.
Note that this Setting is equivalent to the Save Password option which appears on the login screen. Changing the option here will automatically change the setting on the login screen and vice versa.
If you are using Google OAuth to login, this option works slightly differently, see Log In Using Google OAuth Authentication for details.
-
When you have finished on the Settings screen, tap
 .
. -
If this is the first time you have run the Digitise Apps Client and you have not yet created any Digitise apps, you can close down the Client. On the other hand, if you do have apps available and you haven’t previously checked for available apps or updates, you can use the Refresh button,
 , to download them to the device. For more information about closing the Client and downloading apps, see Run Clients and Standalone Apps on iOS Devices for more information
-
If you have previously published Digitise apps for Android devices and you want to try running an app on an Apple device before you have published any apps specifically for Apple devices, you can download your Android apps to try them out. To do this click on the Settings button,
 , and then select Android under the Device emulation option. Return to the Home screen and tap the Refresh button,
  . Any published Android apps, which are available to you, will now be available to download to your Apple device. The Home screen will indicate that you are downloading and running apps designed for a different Platform by including the emulation type in the list tiles, e.g. Available for Download (Android). Apps downloaded in this way may not display or work fully.
You will need to remember to return to the Settings screen and reset Device emulation back to None before you will be able to download any apps you have created for Apple devices.